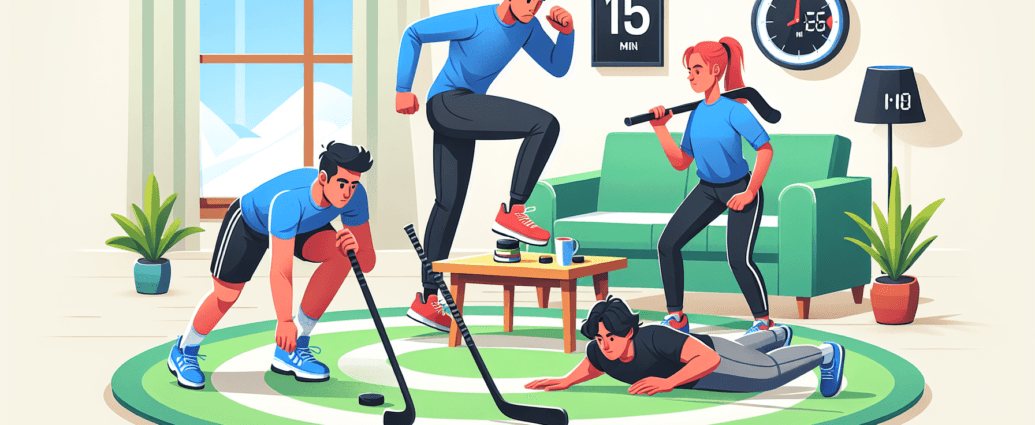

Hockey Conditioning at Home: 15-Minute Routines for New Players
Getting started with hockey conditioning doesn’t require a gym or fancy equipment. For new players, short, focused workouts done consistently can build speed, endurance, balance, and strength—key ingredients for skating harder, avoiding injuries, and handling the puck with more confidence. Below are three ready-to-use, 15-minute routines you can do at home with minimal space and no special gear. Each routine follows a simple structure: a quick dynamic warm-up, a 9-minute main circuit (three 3-minute cycles, each cycle containing three 40-second work blocks with 20 seconds of rest between blocks), and a 3-minute cooldown. The exercises are hockey-relevant, emphasizing fast feet, core stability, leg strength, and balance.
What you’ll need (minimal)
– A clear space: roughly enough for a couple of feet of lateral movement and a short sprint in place.
– Athletic footwear with good grip.
– Optional: a light pair of dumbbells or household items (a filled backpack, water bottles) to add resistance.
– A timer or stopwatch to keep you honest with 40/20 intervals.
Why this structure works
– Three 3-minute cycles per routine create a total of 9 minutes of work, plus a 3-minute warm-up and 3-minute cooldown, landing at about 15 minutes.
– Each cycle consists of three exercises, each performed for 40 seconds with a 20-second rest, giving you a consistent rhythm and a straightforward progression path.
– The movements mirror on-ice demands: sprinting and quick starts, lateral movements, squats and lunges for skating power, plus core and balance work to stabilize your torso during shifts, shots, and stick handling.
Routine 1: Speed and Agility — Quick feet, fast reads, faster corners
Goal: Improve acceleration, multi-directional movement, and footwork for tight turns and tight spaces on the ice.
Warm-up (0:00–3:00)
– 1) 60 seconds: high knees in place
– 2) 30 seconds: butt kicks
– 3) 60 seconds: leg swings (each leg)
– 4) 30 seconds: hip circles and ankle circles
– 5) 30 seconds: light jog in place or step-touches to raise heart rate
Main circuit (3 cycles, total 9 minutes)
Cycle 1
– Block A (0:00–0:40): High knees in place (pump knees, quick feet)
– Rest (0:40–1:00): 20 seconds
– Block B (1:00–1:40): Lateral skater hops or side-to-side steps (quick, controlled)
– Rest (1:40–2:00): 20 seconds
– Block C (2:00–2:40): Bodyweight squats (depth comfortable, driving through hips)
– Short reset (2:40–3:00): 20 seconds if you want a quick breath
Cycle 2
– Block A (3:00–3:40): Mountain climbers (steady pace; controlled)
– Rest (3:40–4:00): 20 seconds
– Block B (4:00–4:40): Cone-to-cone rapid shuffle or two markers on the floor for a quick shuffle drill
– Rest (4:40–5:00): 20 seconds
– Block C (5:00–5:40): Forward lunges (alternating legs; step softly, knee over ankle)
– Rest (5:40–6:00): 20 seconds
Cycle 3
– Block A (6:00–6:40): Jumping jacks or plyo jacks (gentle landings, soft knees)
– Rest (6:40–7:00): 20 seconds
– Block B (7:00–7:40): Push-up to side plank (alternate sides if you’re comfortable; or standard push-ups)
– Rest (7:40–8:00): 20 seconds
– Block C (8:00–8:40): Glute bridges (hips lift, squeeze at the top)
– Option cooldown down note (8:40–9:00): quick breath and res cooldown down (9:00–12:00)
– 60 seconds: light walking or marching in place
– 60 seconds: hamstring stretch (seated or standing)
– 60 seconds: hip-flexor stretch (each side, 30 seconds)
– 60 seconds: shoulder and chest stretch (towel or doorway stretch)
– 60 seconds: deep breathing, finish with a gentle neck stretch
Routine 2: Strength and Power — Build skating power and shooting stability
Goal: Develop leg and hip strength, posterior chain control, and core stability that translate into stronger strides and steadier handling.
Warm-up (0:00–3:00)
– 60 seconds: leg swings (front-to-back)
– 60 seconds: hip openers (dynamic)
– 60 seconds: inchworms to activate the core and shoulders
– 30 seconds: bodyweight squats (easy depth)
– 30 seconds: inchworms again or jog in place
Main circuit (3 cycles, total 9 minutes)
Cycle 1
– Block A (0:00–0:40): Push-ups (or incline push-ups if needed)
– Rest (0:40–1:00): 20 seconds
– Block B (1:00–1:40): Reverse lunges (alternating legs)
– Rest (1:40–2:00): 20 seconds
– Block C (2:00–2:40): Glute bridges or hip bridges
– Rest (2:40–3:00): 20 seconds
Cycle 2
– Block A (3:00–3:40): Goblet squats (use a dumbbell, a backpack with books, or a filled water bottle)
– Rest (3:40–4:00): 20 seconds
– Block B (4:00–4:40): Bent-over rows (with a backpack or resistance band) or bodyweight inverted rows under a sturdy table
– Rest (4:40–5:00): 20 seconds
– Block C (5:00–5:40): Plank variations (front plank or forearm plank)
– Rest (5:40–6:00): 20 seconds
Cycle 3
– Block A (6:00–6:40): Incline push-ups or knee push-ups (hands on a bench/step if needed)
– Rest (6:40–7:00): 20 seconds
– Block B (7:00–7:40): Step-ups onto a stable chair or low platform (alternate legs)
– Rest (7:40–8:00): 20 seconds
– Block C (8:00–8:40): Plank with alternating shoulder taps or mountain climbers at a slower pace
– Rest (8:40–9:00): 20 seconds Cooldown (9:00–12:00)
– 60 seconds: quad stretch (each leg)
– 60 seconds: hamstring stretch
– 60 seconds: lower-back and hip stretch (child’s pose or figure-four stretch)
– 60 seconds: chest and shoulder stretch
– 60 seconds: deep breathing, finish with gentle neck stretches
Routine 3: Core, Balance, and Stability — The backbone for on-ice control
Goal: Strengthen the torso, hips, and stabilizer muscles essential for balance, body position, and stick handling in tight spaces.
Warm-up (0:00–3:00)
– 60 seconds: cat-cow and pelvic tilts to awaken the spine
– 60 seconds: dead bug activation (slow, deliberate)
– 60 seconds: calf raises and ankle mobility
– 30 seconds: gentle side-to-side hip swings
– 30 seconds: light marching in place
Main circuit (3 cycles, total 9 minutes)
Cycle 1
– Block A (0:00–0:40): Front plank (neutral spine, avoid sagging)
– Rest (0:40–1:00): 20 seconds
– Block B (1:00–1:40): Dead bug (alternate extending opposite arm and leg)
– Rest (1:40–2:00): 20 seconds
– Block C (2:00–2:40): Bird dog (opposite arm/leg reach)
– Rest (2:40–3:00): 20 seconds
Cycle 2
– Block A (3:00–3:40): Side plank with hip dips (40 seconds total; switch sides as needed)
– Rest (3:40–4:00): 20 seconds
– Block B (4:00–4:40): Standing balance: single-leg stance with controlled leg lift (40 seconds)
– Rest (4:40–5:00): 20 seconds
– Block C (5:00–5:40): Side lunges or lateral step-downs (40 seconds total)
– Rest (5:40–6:00): 20 seconds
Cycle 3
– Block A (6:00–6:40): Plank variations: forearm plank with alternating leg lift or march
– Rest (6:40–7:00): 20 seconds
– Block B (7:00–7:40): Glute bridge march (bridge with alternating knee taps) or simple glute bridges
– Rest (7:40–8:00): 20 seconds
– Block C (8:00–8:40): Pallof press or anti-rotation movement with a band (if available) or slow standing objection press with arms extended
– Rest (8:40–9:00): 20 seconds Cooldown (9:00–12:00)
– 60 seconds: hip-flexor and quad stretch (switch sides)
– 60 seconds: spinal rotation stretch (gentle twists seated or standing)
– 60 seconds: child’s pose with extended arms
– 60 seconds: chest and shoulder stretch
– 60 seconds: deep breathing to finish
Modifications and tips
– Space and safety: If you have limited space, swap out lateral hops for smaller step-touches. If you have a knee issue, reduce the depth of squats and lunges, or substitute chair-supported variations.
– Equipment substitutions: A backpack filled with books can stand in for free weights. If you lack a mat, use a towel or a soft carpeted area for knee-friendly floor work.
– Intensity adjustments: New players should start with shorter holds and fewer repetitions. If 40 seconds is too long, begin with 20–30 seconds and work up.
– Injury considerations: If you have a prior knee, hip, or back injury, consult a trainer or physical therapist before starting. Focus on form over speed; quality reps protect joints.
Progression and finding your pace
– Build consistency first: aim for two to three 15-minute sessions per week as a baseline. Gradually increase the duration of the work blocks or add 5–10 seconds to each block every week or two as tolerance improves.
– Add resistance gradually: once the routine becomes manageable, add light dumbbells or a backpack to squats and rows, or use a resistance band for added tension in rows or presses.
– Increase complexity later: as you become more comfortable, swap some movements for more hockey-specific drills—e.g., ankle-stable hops, quick-twitch toe taps, or ball slams if you have access to a medicine ball.
Putting it into a weekly plan
– A simple, sustainable approach is 2–3 days of conditioning per week on non-consecutive days to allow recovery.
– Consider pairing one conditioning day with a skill session (p stick handling, passes, or stickhandling drills) and another day with a light snow- or plyo-focused session if available.
– Always finish the week with a lighter day focused on mobility and active recovery (gentle stretching or yoga).
Why new players should do home conditioning
– Builds foundational strength and endurance without requiring a rink or gym access.
– Improves skating efficiency by enhancing leg drive, hip stability, and core control, which translates into longer shifts with less fatigue.
– Reduces injury risk by strengthening the muscles around joints and improving balance and proprioception.
– Supports mental preparation: a consistent routine creates discipline, confidence, and a sense of readiness for on-ice challenges.
Key safety reminders
– Prioritize form. Poor technique increases injury risk. If you feel pain beyond normal muscular effort, stop and reassess technique or seek guidance.
– Hydration matters. Drink water before and after sessions.
– Warm up and cool down every time. They’re not optional; they reduce injury risk and improve performance.
– Listen to your body. If you’re new to fitness, start with shorter blocks and fewer cycles, then gradually build up.
Conclusion
You don’t need a fancy gym or a full training facility to begin hockey conditioning. With these three 15-minute routines, new players can establish a strong conditioning foundation that supports speed, power, balance, and on-ice efficiency. Consistency is the cornerstone. A 15-minute commitment a few times a week, paired with proper warm-ups and cooldowns, will yield meaningful gains in a matter of weeks. As you grow fitter and more confident, you can tweak these routines by adding light weights, more challenging balance drills, or longer work blocks. Still, the core principle remains the same: short, focused, hockey-relevant conditioning done regularly.
If you’d like, I can tailor a four-week progression plan based on your available space, equipment, and current fitness level, or build a version that aligns with your preferred practice schedule. Either way, these routines give you a practical, goalie-to-forward approach to stay conditioned, stay safe, and stay competitive—on the ice and off.